Friday 31 March 2017

How to register your car as new

Mistake number 1 - assuming registration of the car was simple

Mistake number 2 - leaving it until after the IVA to prepare

This blogpost covers registering your car as new, from an AK perspective, within the UK only and is correct as at the time of writing. Please check for up to date information with the DVLA. 

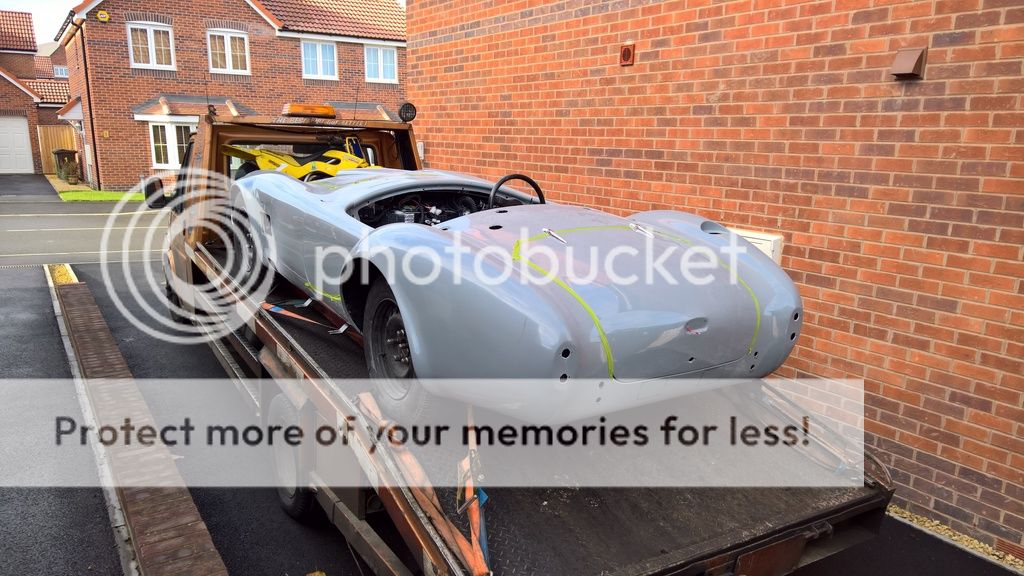
Registration of the car is straight forward process, however, if you are not prepared you will find yourself in the same situation that I was until today. A car passed IVA but waiting on forms to apply for your V5 which is needed to get your number plate.

For a new registration you need:
  1. V55/4 - only available from the DVLA through the Gov.uk website. A form which gets sent through the post as its carbonated.
    1. The link at the time of writing is https://forms.dft.gov.uk/order-dvla-forms/
  2. V627/1 Built up inspection report.
    1. The link at the time of writing is https://www.gov.uk/government/publications/built-up-vehicle-inspection-report
  3. V267 Certificate of newness. Only available from AK Sportscars.
  4. A copy of a household bill, such as council tax as proof of address
  5. A photocopy of your photocard driving licence
  6. A copy of your insurance certificate.
    1. This must be a full on the road policy, insured on your chassis number not a laid up policy.
  7. A copy of build receipts for your major components
  8. Your IVA certificate
  9. The new registration fee (Currently £55)
  10. The first registration road tax fee (Currently £235)

Optional is your V750 certificate of entitlement to put your private plate onto the car. In my case there was no fee to pay as the registration had never been assigned to any car.


The process


Around 20 days before your IVA request the V55/4 form. There is no point doing it much before then as they change the form often, but it does take around 10 days to arrive and I had to request it twice (once online, once on the phone) before I received it.


As soon as you pass IVA, send AK a copy of the build receipts used for the IVA submission. Essentially all major components (as defined in the V627/1) plus a small selection of other items. AK also need your engine number and chassis number, colour of the car and IVA certificate number (the ZY number). They will then create this form and send it out to you.

Whilst you are awaiting this form, sort out your insurance and prepare copies of this plus your proof of address, driving licence and another copy of the IVA build receipts to include in the submission. My insurer insured it on the chassis number for 30 days so this needs doing just before you about to submit the files to allow time for the V5 to arrive.

Take a copy of your original IVA certificate (for your own records) and put the original into the DVLA submission

Write cheques for the payments to include in the submission (this can be a combined amount with a post-it on to explain the charges. I prepared separate cheques). Note the AK is taxed on "Class 11 PLG over 1595cc" rates and not the normal co2 bandings.

Complete the V627/1 built up inspection report in the following way

Add your name/address/phone number in the relevant boxes. Then:

MAKE: AK Sportscars
Model: AK 427
Colour: Your colour
Mileage: Your mileage
Tax Class: PLG
Year of manufacture: The year you passed IVA/Completed the car
Currently Taxed: NO

CarsSerialOriginMakeReceipts
ChassisYour Chassis NumberNEWAK SPORTCARSYES
AxlesRECONDITIONEDJAGUARNO
TransmissionYour Gearbox MakeNEWYour gearbox makeYES
SteeringNEWAK SPORTCARSYES
EngineYour Engine NumberNEWYour engine makeYES
SuspensionNEWAK SPORTCARSYES

Original parts not used: N/A
Year in which rebuild was completed: The year you completed the car
Was the vehicle rebuilt by you: YES

Sign and date the form. No other detail is needed. Attach your build receipts to this form. To help the DVLA I placed a post-it on the major receipts with plain English what the receipt covered. I also included a post-it with this build diary address in case they wanted to check out my claim that I had built the car.

Once the V55/4 arrives you can complete it using the V355 notes document. Much of this form doesn't need to be completed as the information is on the IVA certificate. Key items are that your car is 2 AXLE RIGID and PLG (Private Light Goods).

Add all the forms together. Check, double check, triple check with an independent person (I called AK and went through it). Then send it all off to the DVLA secure, recorded delivery so that you can track it and you get a signature to confirm receipt.

This is where I am at the time of writing, the forms were sent today and will be with the DVLA by 1pm on Monday 3rd April. I am hopeful that I will receive the V5 in time for Stoneleigh at the end of the month.


Friday 24 March 2017

Passed IVA

The 22nd March was one of the most stressful days of my life. Up at 3am to get to Norwich for 8am but all worth it in the end.

MY CAR PASSED !!!!!  😊😊😊😊😊


Although the letter states that mobiles are not allowed I managed this sneaky photo of the tester Dennis who was a great guy. He made us coffee, talked us through what he was doing and although he was very meticulous he also recognised a car that had a lot of effort put in and appreciated this. Its hard to explain but he obviously was not trying to find something for it to fail on but by the same token, if there was something wrong its obvious he would have picked up on it too.

Here's how the test went:

  • Meet and greet + Coffee
  • Initial drive the car into the bay and run it up to temp
  • Check of engine bay, VIN number and Engine number
  • Emissions test on both pipes as I don't have a crossover pipe
  • Move the car onto the ramp and he moves it up and does a number of tests under the car including a full inspection of steering lock and brakes
  • down to the ground and full check of lights, then interior and exterior projections
  • Onto the rollers for a brake testing
  • Onto the next set of rollers for speedo calibration test
  • Outside for a drive around and weighing of the car
  • Noise test
  • Back into the office for weight calcs and final result of test
There are a few items you need to think about before IVA.
  • Go with a full fuel tank, this is an IVA requirement for the weights to be calculated correctly
  • Cover your windscreen wiper motor with foam as this will fail IVA otherwise
  • If you have insurance you ARE allowed to drive your car to and from the IVA test. I checked this with Dennis and he confirmed it to be true (EVEN IF IT FAILS!)
  • Do not try to cover the car for transport as the cover could damage your paintwork (I know as I now need to get the rear wing re-sprayed). It came back in the heavy rain and hardly got wet inside. Air flow over the car must prevent rain getting in as much as you would think.
  • Take snacks/drinks as you will be at the appointment for up to 4 hours and are expected to help.
  • Take as much of your toolset as you can, just in case the IVA tester finds something wrong but gives you a couple of minutes to rectify the issue.
  • Most of all be friendly to the tester and present a clean, tidy car. If your car looks a mess he will go over it with a fine tooth combe. If it looks clean and tidy he will be more likely to believe you have done a good job and will go through his tests without trying to find other faults. If you are an arse with him, expect him to do his best to find a fault - this is not anything for or against IVA testers, its simple human behaviour.
  • AK can help with these items
    • Cover your metal steering wheel centre with foam and leather.
    • Cover your side louvres with something blunt (rubber or tubing)
    • Ensure your front indicators meet the height requirements
    • Ensure the boot number plate light is high enough
    • Ensure your head rests are both high enough for the seat belts and high enough for the headrest requirements of the IVA test
So now all I need to do is get through the DVLA registration process.


Sunday 19 March 2017

Final items and Ready for IVA

Its been such a mad rush to get the car ready for the summer that I haven't had a chance to post until now; and that's only because shes now ready for the dreaded IVA test.

Booked for March 22nd, 8am at Norwich.....wish me luck.

So what's been happening I hear you ask (or that could just be the voices in my head)....

When the car came back from having the interior fitted I needed to reconnect the dash. This was a nightmare job as there are so many wires from the first time I did this. The wash wiper wouldn't work which turned out to be the BMW connector pins had come loose. The brake light wouldn't work (because this is switched earth not positive), The horn didn't work (also turned out to be switched earth not positive) and I had to make wiring for the aux power and wire in the immobiliser. Obviously I'm not going to provide too much detail regarding location of the immobiliser but although it takes time to fit, its fairly straight forward and like any immobiliser it breaks certain circuits unless you put the fob near the receiver.

After mentioning it to Jon at AK he said he usually wires up the dash after the dash is covered in leather as it only needs to be done once then - a good tip for next time...

Now onto the final prep of the car. I cannot recommend doing this more as I found a number of items that would have been a definite fail and now I am much more confident.

So onto the local MOT station to have the car setup. They:


  1. Aligned the front headlights
  2. Tested the emissions, which he said were perfect.
  3. Tested the brakes and the handbrake.
  4. Gave the car a good visual once over checking for leaks etc
  5. Aligned the front wheels
This turned out a few issues which had to be resolved. One point for anyone who is questioning the Hollins electronic handbrake conversion. Here's a picture of the car sat on a tilt and slide transporter going for its interior. Held just on the handbrake on a reasonable angle.

  1. The front drivers wheel was catching on the bottom corner of the inner stainless steel wheel arch. It only needed a piece taking out about 3 inches long by 1 inch wide but it did mean adjusting the position of the clutch line.
  2. The drivers side headlight only just managed to get to the legal limit probably due to the shape of the body.
  3. I had forgotten to put spring washers on my front calipers and seat belt brackets so the seats had to come back out (which also showed interior seating had forgot to put them on the seats too). Easily resolved.
  4. A small leak was found on the water coolant hose.
It was this last issue that turned out to be a major issue to resolve. After tightening all the hoses and running the car up to temp a couple of times I realised the issue was not the hoses at all but the stainless header tank that I had paid, as you do for any part on these cars, an extortionate amount for. Basically it had crap welding around the 90 degree joint so I needed to find a welder at midday on a Saturday to re-weld the joint. Luckily Si Smith (another Cobra owner) came to the rescue as he knew someone. A few hours later and a newly welded bottle was re-fitted and all was dry again.

Whilst re-fitting this I also gave the car a full once over, zip ties were added to any loose wires which may have been suspect, bolts that were possibly too long trimmed down and any possible sharp edges removed. This all takes a lot of time to do (2 whole days), checking and double checking lights and fitting any modifications required such as AK's IVA compatible parts which helped fix a couple of last minute non-conformities.

The last task was to calibrate the speedometer. I found the best way to do this was to use the "Drive To Set" feature of the Smiths Flight gauges. Simply start the car with the trip button pressed in for 3 seconds and wait. "DTS" will appear and then press and hold again for a couple of seconds and the display will show "*00000". Then drive the car exactly one mile (on private land of course as you are not legal for the public highway). Simply put the car at the start point and put a marker (I used the tow car) exactly one mile away. You can simply drive around a large work car park to do this, it does not need to be a straight line but it must be a mile. Park up at your marker (or behind the tow car) and then press the button again and it will display "DONE". Switch the ignition off and on again and all should work. According to my GPS Speedometer app on the mobile, my true speed is 28mph when the gauge is showing 30mph so I am well within tolerances (well see on the day I suppose).

One piece of information that I had to figure out was the Tremec T56 Magnum electronic VSS wiring. It has two white wires on the sensor but no instructions. It turns out that the you need to use the red/blue wire from the speedo into one of the connections and the other should go to an earth. I hope this information helps someone avoid the 2 hours of trial and error I had. Once sorted the Accutech reverse lockout sensor worked a treat too. Below 5mph it allows you to easily select reverse but above it starts the solenoid making it difficult to select it.

So now she's as ready as she is going to be. Regardless of what happens on Wednesday I want to thank the following people who have made a real impact during my build.

  • My future wife Katie, for accepting this obsession of mine, despite the frustrations and cost of the build
  • My Dad who has been there whenever I needed an extra pair of hands
  • Simon, who has always offered advise and loaned parts from his car when I needed to check things or parts hadn't arrived in time for things like the car going for its exhaust
  • Alan, for being a sounding board throughout the process (and loaning parts)
  • Jon and Wendi at AK for putting up with my many questions and clarifications
  • The guys on the Cobraclub forum for advice (the good, the bad and the down right insane opinions)
Wish me luck everyone.


Interior Fitting

After the door cards were fitted I sent the car to Interior Seating at Maunside, Mansfield to have a full leather interior, and the boot carpeted. Overall they did a good job, including creating some Velcro removable panels for the battery cover and for going around the roll bars. One issue that arose is that the door panels that you make, if you follow the AK instructions to the letter will be too big as on top of the door card they will put 5mm foam (collapses to 2mm). So, I recommend, when making your door card cut the wood roughly to the shape of the door. Then with the door closed draw around the fibreglass lip that the door rubber sits on and then trim the door card to this size.

Once you have the rough size chamfer the edge and essentially the door card will sit on top of the door rubber ensuring the door can shut properly. In hindsight, I actually recommend doing this bit before bonding in the door lock wedges so that you can ensure your doors are well aligned prior to getting your interior fitted.


This is because when the car came back from having the interior fitted the doors didn't close well and it needed some adjustment. Fair play to Interior Seating as I put the card in the post on next day delivery and they returned it to me the day after adjusted as requested.

As you can see its a very nice final result.

One final note is that when you send it off remember to send off any gear stick gaiter chrome rings as the interior doesn't come with it but they will fit it when making the interior if you send it off with the car (otherwise you have to do it yourself)

Saturday 18 February 2017

Door Cards & Seat Belts

The car is getting its interior next week so it's been a rush to complete the jobs necessary to not need any further fabrication on the interior of the car.

First job was to make the door cards. This is made from 3mm plywood. First draw round the shape of the door and then cut the shape about 1/4" / 6 mm inside that line. Once done chamfer all rounded edges to 45 degrees.

The manual will tell you to drill 10mm holes but what it doesn't say is that the actual clip is offset to where you drill the door card so don't drill straight through the card and door (as I did). This will just mean throwing away the first door card and starting again :-)

The clips (Clip 260) is from Woolies Trim. Once attached to the door just add the door catch and check all is ok.

I found the passenger side to be more difficult that the drivers. The lip on the door is higher and needs sanding down otherwise the door lock will foul on the door rubber.

Also make sure you have plenty of P38 on the door lock metal brackets. If you go sparingly then the jolting of the door will make it break away and you'll have to re-set it from the beginning...guess how I know.....

The seat belts require bigger holes than you might think. The top mounting holes need to be big enough for the ring to screw right up to the mounting bracket and you will probably have to cut the bolt length down so that it doesn't foul on the body after it passes through the bracket. The lower bolts need around a 30-40 mm diameter hole. This is because the body does not sit well into the tub leaving a large gap from the body to the chassis. To ensure safety you will need to insert some spacers into the gap. You'll also need some long 50mm 7/16ths 8.8 High Tensile bolts to bridge the gap.

The door surrounds are simply screwed to the wooden blocks you have inserted. You can trim them just below the door wedges and just after the scuttle to get a better fit (Jon at AK advised he does this). Bolt or tie wrap them to the scuttle.

Finally, I have boxed in the wiring in the boot and the battery area to ensure nothing gets damaged when I have things in the boot. Once carpeted this should work pretty well although I will need to carry a small screw driver in case of the battery having an issue. I have just used spare 3mm ply and some 25mm * 15mm wood beading. The beading was sikaflex into place then the ply screwed to that to allow access if needed.


Sunday 29 January 2017

Duct Mesh & Sealant

It took a little trial and error to cut the mesh to shape and fit it. I have covered the oil cooler, brake duct and triple nose vent hols with 1.6mm stainless steel woven diamond mesh as it looked better quality than the aluminium and square mesh. The disadvantage is that it is very difficult to shape.

In the end I went with the tactic of cutting a used piece of fibreglass to the shape of the hole and then clamping this and the mesh in the vice, using the angle grinder to cut it roughly to shape and then a small tap hammer to bend the metal aver the fibreglass.

Once it has been shaped use tie wraps (zip ties) to hold them in position.

Then add plenty of your favourite bonding adhesive. I've used SikaFlex so I doubt they will ever come off without power tool assistance.

24 hours at a half decent temperature and the ties can be removed (that'll be a week then in this freezing weather).

I have also started to seal up all the holes in the bodywork. Some are easier than others (where the screen pillars come through the bodywork and the roll bar holes) but others, such as the bulkhead holes are much more difficult to access. For anyone reading this before you build one of these cars, seal these up early in the process before you put the wires though, leaving just enough room to put the wires through, then you just have to finish them off later.


Sunday 22 January 2017

Almost all back together


Life has been very hectic with an amazing few weeks in Australia, an MBA assignment to do and of course getting the car back together.

I'm almost there now although it has been slower than expected. It takes quite a bit of time to mask up the paintwork so you don't scratch it, holes need to be re-drilled out and fitting the side vents is somewhat of a nightmare.

I'm getting there now though and I think it looks great so I thought I'd share progress.

If doing this you will be surprised just how many parts there are to refit. So far, I have done


  • exhausts
  • side vents
  • side repeaters
  • headlights
  • indicators
  • windscreen
  • roll bar and escutcheons
  • demisters
  • washer jets
  • front nudge bar and overriders
  • aston fuel filler
  • wheels (well two of them at the moment)
Anyway, enough of my rambling - it's the photos you'll want to see, so here they are.


Thursday 8 December 2016

Heres the colour

This is my last update before the car comes back from paint in a few weeks (as I can't take delivery before then). It just needs its final polish and I think it looks great.


Friday 25 November 2016

Primed for Paint

Checked in with SMS today to see how the car was getting on. It will hopefully be ready for collection in a couple of weeks as its already primed with all the prep work completed.

I knew SMS had a good name when I sent the car there but I have to state I'M IMPRESSED!!

The quality and attention to detail of the prep work is amazing. They have smoothed in the nose cones and the lower wings like they were part of the moulded body and the extra attention to getting the gapping right (even building up the main moulded bodywork to close gaps) is just what you need from your painter to ensure the final product is as good as it can be.

After seeing this I have high hopes for a few weeks time when I get to see the car again!


Saturday 5 November 2016

Time for some colour

I have decided its time to go for it and send it off for paint. The chosen colour is Jaguar Odyssey Red with no stripes (because the Mrs thinks it will make it look like a tube of toothpaste).

It should look something like below:


Once complete I'll add pictures but it'll take a few weeks as it will only arrive at the paint shop today.


Hopefully it will be early December when it arrives back, but as I have a holiday coming up it may be the new year before I can take delivery back. Rest assured, the moment its back I'll let everyone see what it looks like.

EDIT: the car received minor damage in transport! a slight crack on the lower valance and a hole ripped in the oil filter. The transport company (Grim Salvage) were great and had already paid SMS Autospray to correct the crack before they called me to ask which oil filter and oil they needed to send to replace the damage. SMS were happy it was minor and I wouldn't even know it had ever happened by the time they had finished with it.

It goes to show that problems can't always be prevented but the real measure of customer service is how its dealt with when they do arise. Despite the issues I will use this transport company to bring it back - albeit on a trailer rather than the transporter so its easier to get on an off!

Last few jobs before paint

This week was a mad rush to get the car ready before I strip it for paint. A couple of key jobs were on the list.

1) Door locks and wooden blocks.
I found that the locks and AK bolts don't quite fit together and the lock holes will require some drilling out to all movement when fitting. Also, when the lock wedges are put in place the door panel doesn't quite sit flush. I spoke to Jon at AK about this and he said because its usually wood above the wedge bolt he cuts the door panel short and then carpets over it.

Progress so far:


The important thing is so get a basic door gap correct (the paint shop will do the rest) and ensure that when you p38/p40 bond everything together that the door is as flush with the body as possible and not touched until completely dry.

2) Washer Jet test
This didn't go so well. I'm using the S&J jets which are really nice jets and I had put them where AK recommend. The result is that they fire water clean over the top of the screen and into the drivers footwell; not great for IVA or for keeping me dry whilst driving!

I filled the holes and moved them closer to the screen (right next to the bulkhead) and they still barely hit the screen so I'll need to find a way to point them down further or replace them when it comes back from paint.

3) Windscreen wipers
I also have a small issue with the windscreen wipers. Whenever I switch them on they work but wont switch off again!. Jon at AK pointed out that the two blades in the relay block which look like fuses are actually diodes and they need to be in the right way around (I had taken them out to fit the block). See the picture below - the diodes have a small notch in one side (hard to see but its at the bottom of the diode in the pic). I didn't find this out until yesterday when at AK so I'll have to check this when it comes back from paint.

Saturday 22 October 2016

Snag List

Just lately I've been working through my snag list.

1) Gearbox mount needs amending.

When I fitted the gearbox rubber and bracket it was 12mm away from the body (in order to keep the prop shaft level) so this weekend I took off the rubber mount, used a crow bar to pull out the rubber bit and then trimmed the bracket down my 12mm. Plenty of Sikaflex into the mount and 12 hours later the rubber part is solid again.


I have also never been happy with the threaded bolts holding on the bracket. The metal in the chassis only allows a couple of threads and I though a combination of an M10 and an M8 bolt would suffice but putting the bracket back on I just wasn't happy with the fact things wouldn't tighten up as much as I wanted to and I was scared of stripping threads completely.

The solution was to drill right through the chassis and into the tub in one of the holes so that I could but a long M8 bolt through with penny washers and nylocs. This was much easier to tighten and I am much happier with the thought of so much torque going through the gearbox and its mount.


2) Boot Gas Struts Not Fitted

I had attached the boot brackets as per the AK instructions (19" diagonal to rain gully from boot hinge) and moulded them in with P38. All I needed to do was rivet on the boot hinges (11") lower bracket and let some gas out of the struts to allow the boot to open/close.


3) Lambda sensor wires hang down

The lambda wires needed to be clipped up into place under the car to prevent them from snagging (an IVA fail). Again, easily fixed with a couple of p-clips and rivnuts each side.


4) Brake pipe and Fuel pipe adjustments

Whilst under the car doing the gearbox I noted that I had a small leak on one of the brake pipe connections. Easily tightened and sorted. I also noted that my fuel pipe had a bit of excess play so I quickly added another p-clip to ensure it stayed clear of the prop shaft.

5) Indicator and Headlight Bulbs

I had major issues sourcing the correct bulbs for the lucas lights as they came with clear bulbs and I needed amber for the indicators. They also came with blue tinted headlights and they must be white light for IVA. LED versions for the indicators didn't work well at all, then I tried Halfords (didn't fit) and CBS in an attempt to get the right bulbs. All sorted now after finding the article below.

https://en.wikipedia.org/wiki/List_of_automotive_light_bulb_types

Essentially the R5W bulb that came with the indicators is a sidelight bulb, hence the problems finding it. First you need to check the cap base, for me this was a BA15s. This makes sure its the right size base. Secondly you need to check if it is opposite of offset pin. For me it was opposite, which was a P21W as opposed to a PY21W which is offset.

Getting silver/chrome bulbs also helped avoid the fried egg look.

6) Washer Jets

I finally got around to completing the washer jets too. This was simply a case of cutting Halfords washer jet tubing (5mm) to lengths of the right size to run along the wing around the coil packs I had fitted and up to the first jet.


Here I cut the tube and inserted a 5mm T-piece. Two other lengths were then cut to run to the jets and it was held in place by cable ties attached to cable tie base plates.


In order to hold the tubes in place I used 5mm spring clips from ebay for the S&J washers and 7mm for attaching to the washer bottle pump and the T-piece.


7) Fuel Sender not working


The fuel sender that I had been given, which seemed to fit the AK tank well does not work with the Smiths Flight gauge it was actually for a smiths classic gauge. After speaking to Europa Spares they confirmed that I needed  different sender. It is cut and fit in a very similar fashion to the previous sender I fitted, however, its smaller and doesn't fit the holes in the AK tank. This meant I needed to fit either an adaptor plate or bond it into place. I decided to bond it into place as there would be fewer surfaces connecting which meant a lower chance of leakage.


Even fitting this sender as per the instructions wouldn't quite get the gauge right as it was working backwards. I am not entirely convinced the gauge isn't faulty but luckily the instructions said "if the gauge works backwards check the diagram as you may have bolted the transducer upside down"; this led me to just fit it upside down and now its working. It seems very sensitive though so I may suffer from a jumpy needle whilst driving.


Perhaps a generic electronic configurable sender would have been a better option; just look at how sensitive the needle is. Theres about 13 litres of fuel in the car from dry to get the needle to this point.


8) Alternator wing adjustment

On the AK the alternator touches the wing so you need to cut out a small square in order for the body to sit on right and to ensure the alternator doesn't get damaged. I have the built the wing up with fibreglass and p-38 so that its still protected from all the crud being sent up from the wings. I completed most of the work some time ago but I just needed to sand it down and paint it up with isoflex rubber paint.


Monday 3 October 2016

T56 Reverse Lockout

The T56 has a solenoid in it which is there to prevent you from accidently selecting reverse whilst driving forward. The solenoid is designed to allow you to overpower it in an emergency but doing so will eventually contribute to early failure of the gearbox.

To address this you can purchase a little device from Accutech which connects to the solenoid and the speed sensor. When it detects you traveling below 5mph it activates and releases the solenoid allowing reverse to be selected with ease.

As you can see its a tiny device which simply screws into place.


Dashboard Prep


I've slowly been working through getting the dash completed as you may have noticed from a few of the pictures posted but I thought it was about time a give it a post of its own.


The first thing you will need to do is fill around the glove box as you'll find it needs some tidying when it comes from AK. I decided not to bother with the whole printing images and moving them around and instead decided to let my creative juices flow as I did it. Also known as "winging it".

Start by fully masking the centre of the dash and then find a centre line. I put the dash into position in the car and that allowed me to mark from the centre of tunnel up to the centre stay of the windscreen. Perhaps not a perfect centre by measurement but it looks perfect by eye which is more important for something you look at every time you get in the car.

From here I cut out the tacho and speedo holes first, leaving enough room in-between for the push to start button.

Then I just worked my way down the dash, measuring and cutting as I went. I chose just three gauges. Fuel, water temp and oil pressure. I didn't bother with a clock or oil temp as I'm not going to track day it that often and I have a watch..

Next was the switches which are the billet aluminium from car builder solutions. There are five in my dash; Hazard, Rear Fog light. Electronic Handbrake (with built in warning light). Sidelights and Dipped beam.

The lights are from S&J. I have chosen two indicator lights which I have fitter in the centre above the start button then the charge, oil pressure and high beam warning lights on the right of the centre of the dash.

The ignition switch hole is hidden on the side of the dash, the long gap at the bottom is for the heater controls and the hole on the right is for the steering column.


And here it is with all the gauges and controls fitted.


Wiring the dash is a long job. I recommend having at least a full day available to get on with it uninterrupted. The image below allows you to see the ignition switch.

The AK manual, as always is not as clear as it could be especially where the warning lights are concerned as some need to be earthed and others need a live feed. This caused a few calls to AK and Jon was helpful as always in figuring out the issue. What you need to ensure is:

1) Charge warning light - live
2) Main beam warning light - earth 
3) Oil pressure warning light - live
4) Indicators - earth


I think the above is pretty tidy compared to some that I have seen but I'll be tidying it further when I do the final fit, after the leather has been fitted in the new year. At least I know that all the gauges and switches work.


Wheels have arrived!

As the title suggests my wheels have arrived from Vintage Wheels in the US. I chose the Shelby 427's and found Bob at Vintage very easy to order from. All I had to do is tell him that it was an AK Gen II and he knew all the correct offsets etc.

Including nut covers, spinners, VAT, import duty and delivery they set me back just less than £2K which is pretty good given that AK charge 2.5K + VAT for halibrand replicas.

Best of all the saving will pay for the tyres :-)

I cant fit them just yet as the car still needs to go for paint and I don't want to risk them getting damaged so sorry folks, youll have to put up with a picture in the packaging for now.